Prior to participating in a session, you should ensure that your audio is configured correctly. Audio settings can be configured using the Audio Setup Wizard.
Using the Audio Set Wizard on a PC
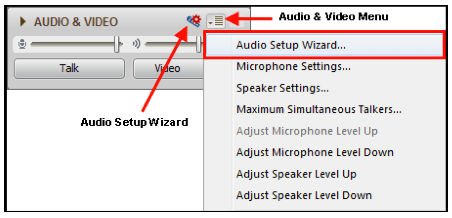
- Open the Audio Setup Wizard by clicking the Audio & Video menu and clicking Audio Setup Wizard. The Audio Setup Wizard is accessible on the Audio & Video panel by clicking the Audio Setup Wizard button or from the Audio & Video Options menu.
- From the Select Audio Output Device dialog, choose the device that will play the session audio e.g. speakers.
- Click OK.
- Click the Play button and adjust the volume slider so that you can clearly hear the pre-recorded message. Click Stop and then Yes to confirm you were able to hear the audio. If you were not able to hear the audio, click No and repeat the previous step.
- Select the device you will use to send your audio during the session e.g. microphone.
- Click OK.
- Click Record and speak into the microphone using your normal speaking voice. Adjust the microphone slide bar so that it displays green bars with an occasional yellow bar. Red indicates that your audio is too loud or you microphone is too close to your mouth.
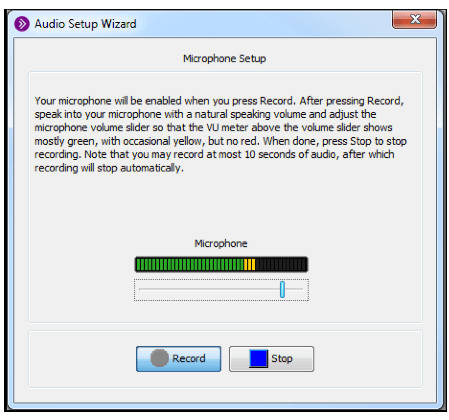
- Click Play and confirm you can hear your recorded voice. You are now ready to participate in the audio portion of the session.
Using the Audio Set Wizard on a MAC
The Audio Setup Wizard on a Mac computer is slightly different than that of a PC. Open the Audio Setup Wizard in the same manner by clicking the Audio & Video Options menu located in the Audio & Video panel. Proceed as described above if you wish to use the default microphone and speakers on your Mac. If you want to use a different device, click the  icon to open the Sound Preferences panel.
The Sound preferences panel has a screen for audio output or how you will hear the session audio and a screen for input or microphone for sending audio.
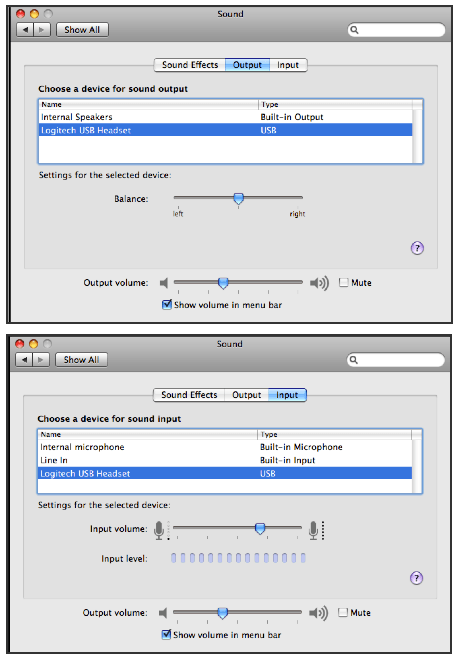
- Select the desired device for both Output and Input. Then close Sound preferences.