In the Full Grade Center, point to Create Calculated Column on the action bar and click Weighted Column.
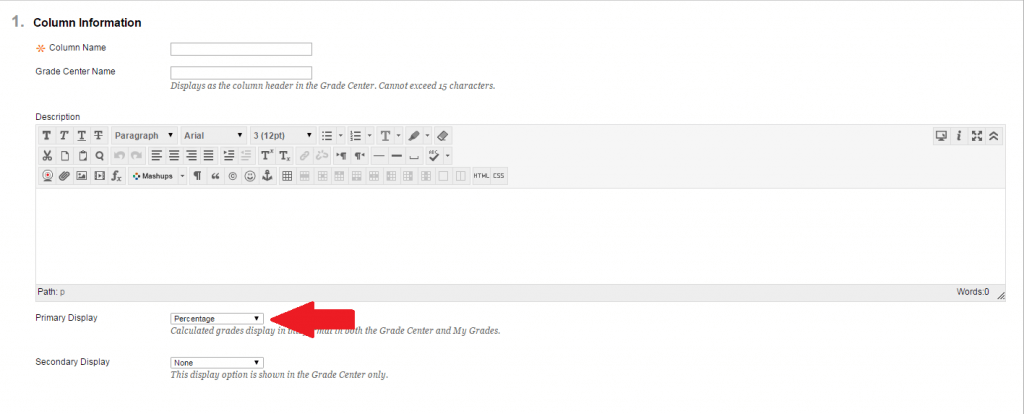
- On the Create Weighted Column page, type a brief, descriptive Column Name. This name becomes the column name in the Grade Center and on students’ My Grades pages. If this name is too long to display clearly in the Grade Center, you can type a short, descriptive name in the Grade Center Name box.
- Optionally, type a Description.
- Make a selection in the Primary Display drop-down list.
4. If grading periods exist, you can associate the weighted column with a grading period by making a selection in the Grading Period drop-down list. If no grading periods exist, the drop-down list does not appear. You can use grading periods to filter Grade Center data and create calculated columns.
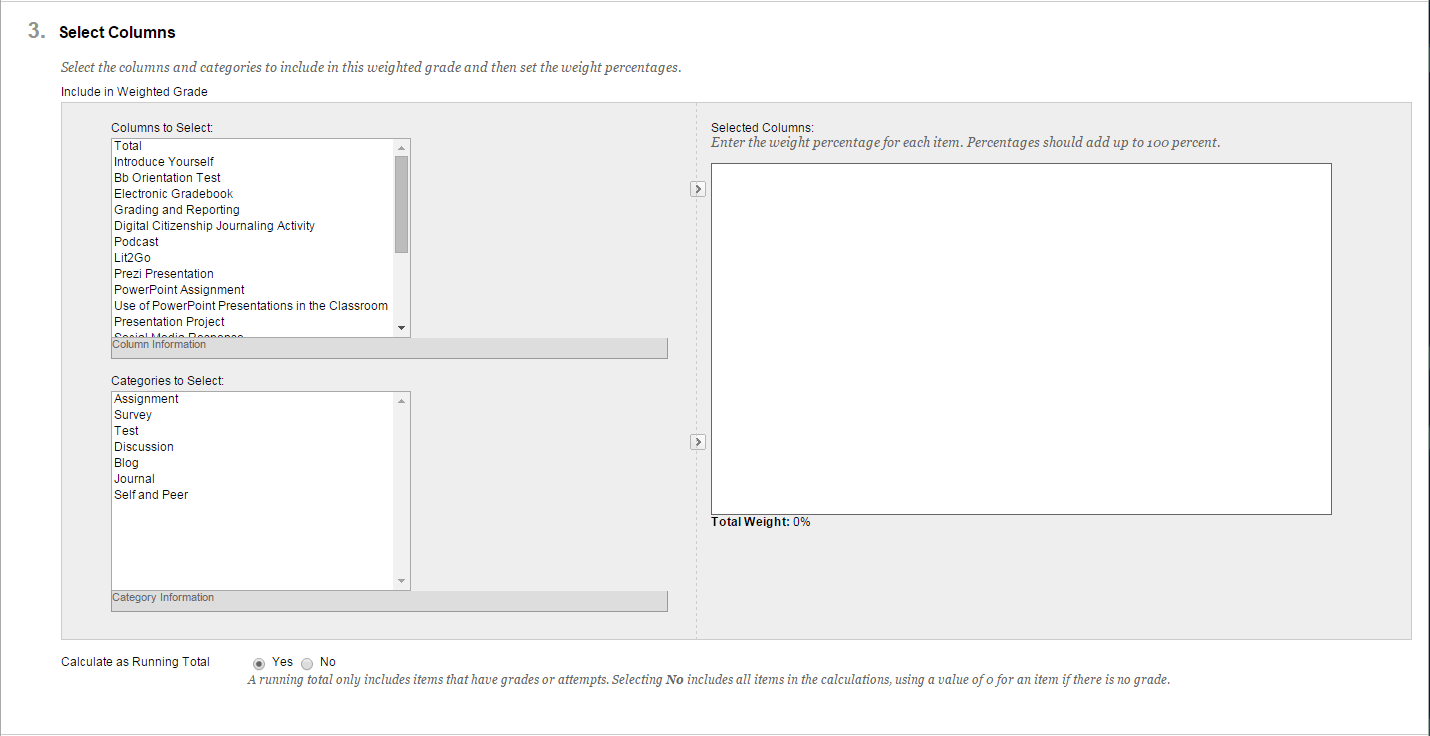
5. In the Select Columns section, select what to include in the weighted column’s calculation and assign percentages for each column or category.
- Select the columns in the Columns to Select box and click the right-pointing arrow to move the selections to the Selected Columns box. When you select a column, you can view information about the column in the Column Information area below the Columns to Select box.
A column that is set to No for Include this Column in Grade Center Calculations does not appear in the selection list.
For Windows, to select multiple items in a list, press the Shift key and click the first and last items. To select items out of sequence, press the Ctrl key and click each item needed. For Macs, press the Command key instead of the Ctrl key.
- Select the categories in the Categories to Select box and click the right-pointing arrow to move the selections to the Selected Columns box. When you select a category, you can view which columns are included in the category in the Category Information area below the Categories to Select box. The following table lists the options that appear after you move a category to the Selected Columns box.
| Option | Description |
|---|---|
| Grading Period drop-down list | If you selected a category for the calculation, you can limit the columns used by selecting a particular grading period. |
| Weight Columns | Select how to weigh columns within the category.
|
| Drop Grades | Removes a number of either the highest or lowest grades for each category from the calculation. If you do not type numbers in the boxes, no grades are dropped. |
| Use only the Lowest -OR- Highest Value to Calculate | Removes all grades from the calculation except for the best or worst score. |
- Type a percentage for each selection. The percentages of all columns added together must equal 100 percent. After assigning the last percentage, click anywhere in the box to update the percentage below the Selected Columns box in the Total Weight field.
- Calculate as Running Total: Click Yes to calculate as a running total. Running totals exempt cells that do not contain data. Click No to include all selected columns in the calculation, using a value of 0 if no grade exists. This can make grades appear artificially low.
- Select the Options:
- Include this Column in Grade Center Calculations: Click Yes to make the column available for potential inclusion when creating calculated columns.
- Show this Column to Students: Click Yes to display the column to students on their My Grades pages.
- Show Statistics (average and median) for this Column to Students in My Grades: Click Yes to include statistical information with the grade value when shown to students.
- Click Submit.


