If you don’t already have a content area available, you may want to create one so that your students know where to go to sign up.
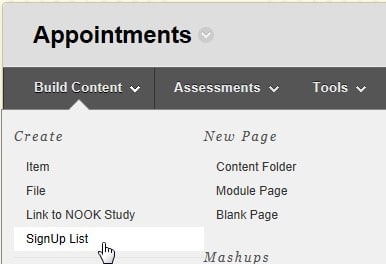
- Go to the content area and click on the Build Content button to show the menu. Select the SignUp List option.
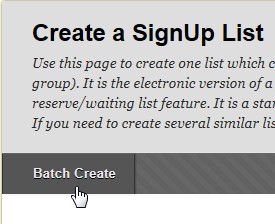
- To create a multiple sign up lists at once, click on the Batch Create button.
- On the next page, you will create up to 20 lists in the List Names field. Add more slots or take away slots by clicking (+) and (-) buttons below the names.

- Include the instructions to appear in the sign up lists. After the list is submitted, you can tailor individual lists if necessary.
- Set the dates and times where you want students to be able to sign up. Outside of these dates, your students will be told that it isn’t open/has closed.
- In the List Settings set up the number of places for each list and the number of reserve spaces for each.
- If you are creating a sign-up sheet for appointments only, set “Number of places” to 1.
- If you do not want to include a reserve list, set the number to 0.
- Show names on the list applies to the students’ view of this list. If it is ticked, they see everyone else on the list. If it is unticked, they will only see their own.
- Choose if you want students to be able to remove themselves from the list, and reserve list(if you have set one)
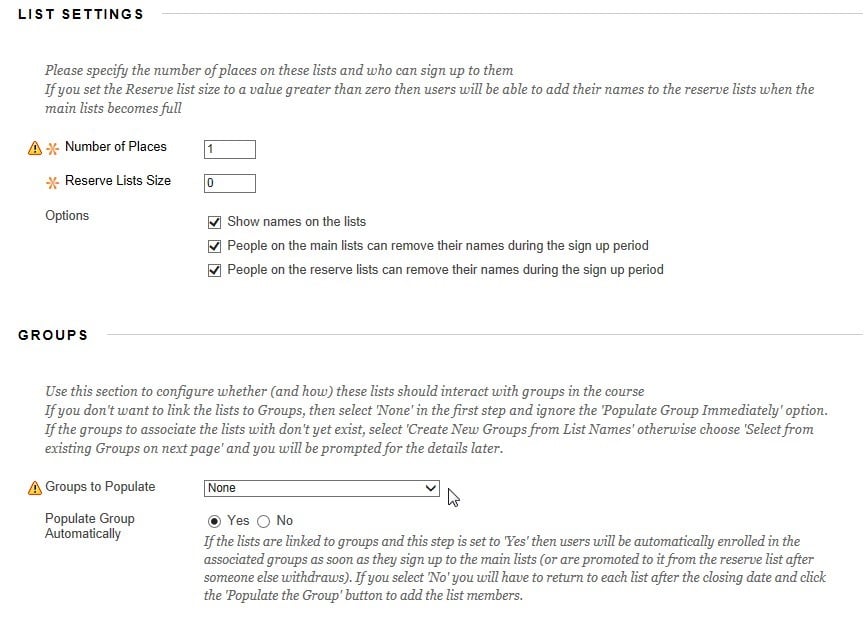
- SignUp List can also populate Blackboard groups if you wish. This can be set to be completed automatically or not. If not, you will have to return to the list after the closing date.
- Create a group if you want your students to engage with each other using blogs, wikis, etc.
- If you’re just using the list as a way of collecting students’ names, you probably won’t want a Blackboard group with this list, so select None.
- 8. Complete the Options
- Select the Submit button.
- If the SignUp list is populating a group, you will see the Create Group screen.
- Edit the group name and description, if required
- Choose which tools are available to the members in the group
- Click submit when you’re done
- Once you click Submit, your sign-up list should be created and ready for students to sign up for an appointment time. Your students will just go to the appropriate content area where the folder is and click on the appointment time they would like, and then click the “Sign up Now” button. They will see a confirming screen showing themselves